DIY Embroidery Hoop Spider Web
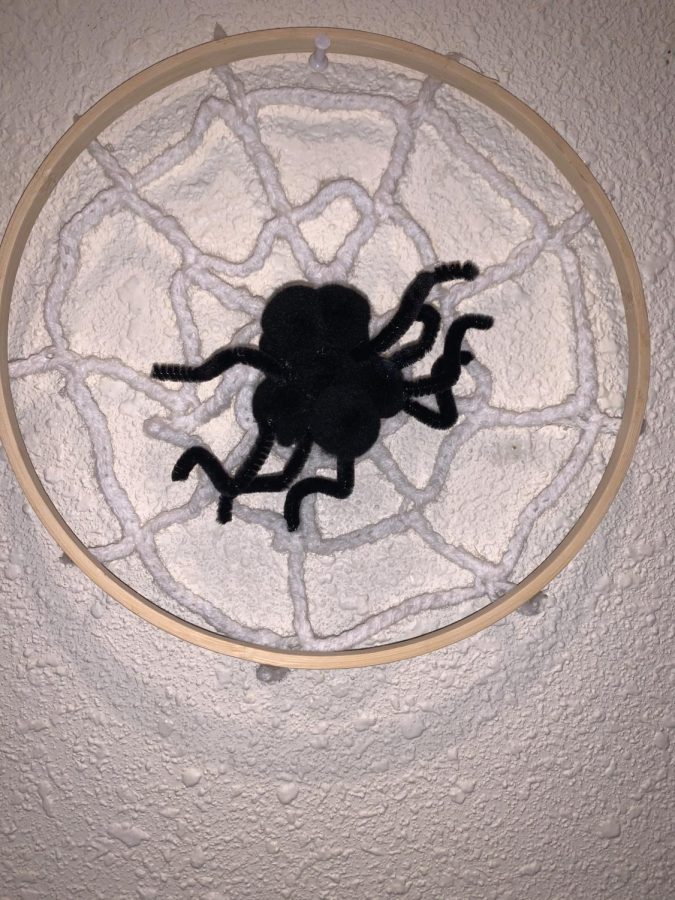
Photo: Helen Vasquez
The finished product!
Halloween is probably my favorite holiday. I love getting to find a cute costume and I love to decorate even more. Since my family never decorates, I thought it would be cool to make my own decoration. While doing a quick search for ideas, I came across a website called Dream A Little Bigger that displayed a crochet spider web attached to an embroidery hoop with its own little pom-pom spider. I thought it looked really cute so I figured I’d try my hand at it. I’m not always the most crafty person, but if I can find something to help me out or give inspiration then I’m all for it! The only problem with this DIY was that I didn’t know how to crochet. I did a quick YouTube search so I could learn some basics and then I was on my way.
Now for the actual spider web itself, I didn’t use the instructions provided on the website. They were very confusing to me so I instead used this YouTube video to help me out.
For the spider web I used:
- Mainstays 100% Cotton Yarn-Artic White
- Boye Aluminum 5mm Crochet Hook
- Embroidery scissors
- Yarn needle
For the rest of the project:
- Janlynn Acc Bamboo Hoop 10 Inch
- Horizon Group Black 1″ Poms
- Go Create Arts & Crafts Black Fuzzy Sticks
- Glue gun
I found all materials at Walmart.
To make the project, I first started with the spider web. I followed the YouTube video and didn’t get lost as best as I could. The spider web in the video and the spider web from the website I found the DIY from are a bit different, but I think that’s what makes this project unique.
How to make the spider web:
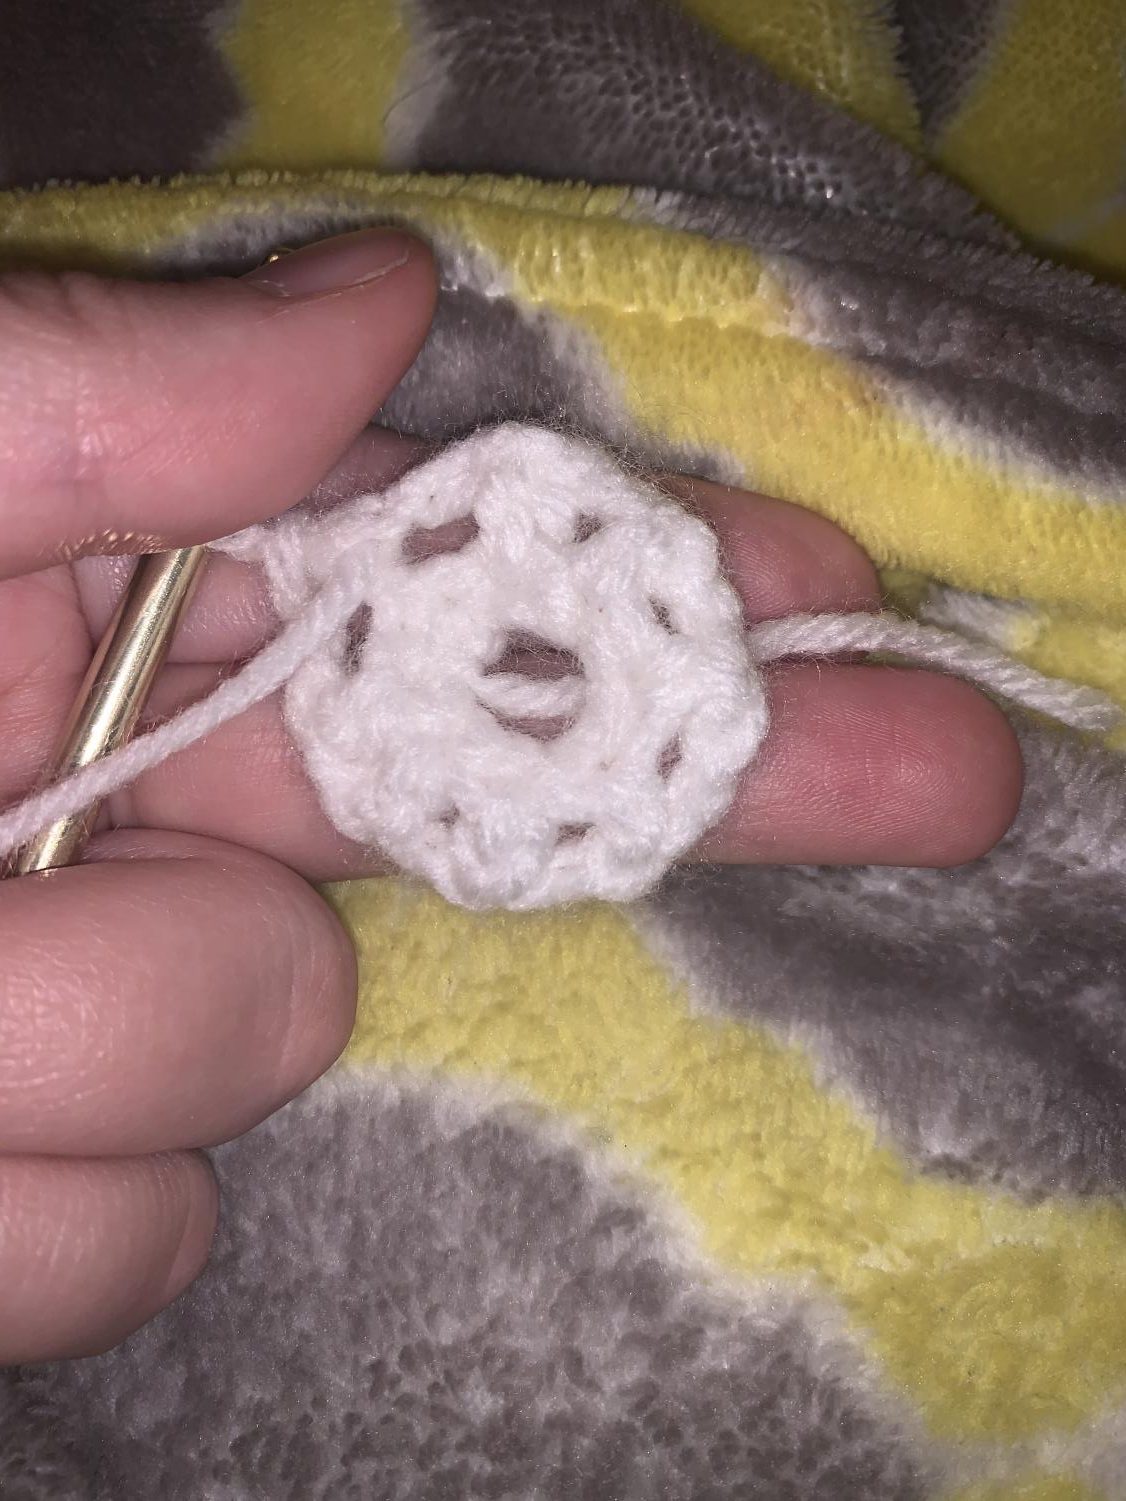
I started by making four chain stitches. I joined the ends using a slip stitch to form a magic ring. From there I made eight single crochets around the outside of the ring (the video can explain this better). Once I had those eight stitches I joined both ends together again by using a slip stitch.
For the next round, I started by chaining three. The first two chains count as a double crochet and the third one is the chain in between the double crochets. After making those three chains, I took my crochet hook and put it through the next stitch. I then made a double crochet. After that, I chained one and then made another double crochet. I repeated this until I had eight double crochets. After I had eight, I chained one again and then joined the ends with a slip stitch.
To start the next round I chained three. Those counted as a stitch so on top of that I chained another five. I then took my hook, skipped one chain, and entered it into the stitch right above one of my previous double crochets. I pulled through until I was left with one loop on my hook. I chained another five and repeated the process until I was back at the beginning. I then chained another five and joined it to the first stitch with a slip stitch to make the ends meet.
The next round starts by chaining five. Those five chains count as the first stitch. On top of that, I chained nine which are the chains in between stitches. I basically repeated the process that I’ve been doing except that this time before I stuck my hook into a stitch, I skipped five chains and then put my hook in right above my previous stitch. I pulled through until I had one loop left on my hook. I chained nine and then repeated the process until I was back at the beginning again. I chained nine again and then joined ends with a slip stitch by putting my hook into the first stitch (the first five chains the round started with).
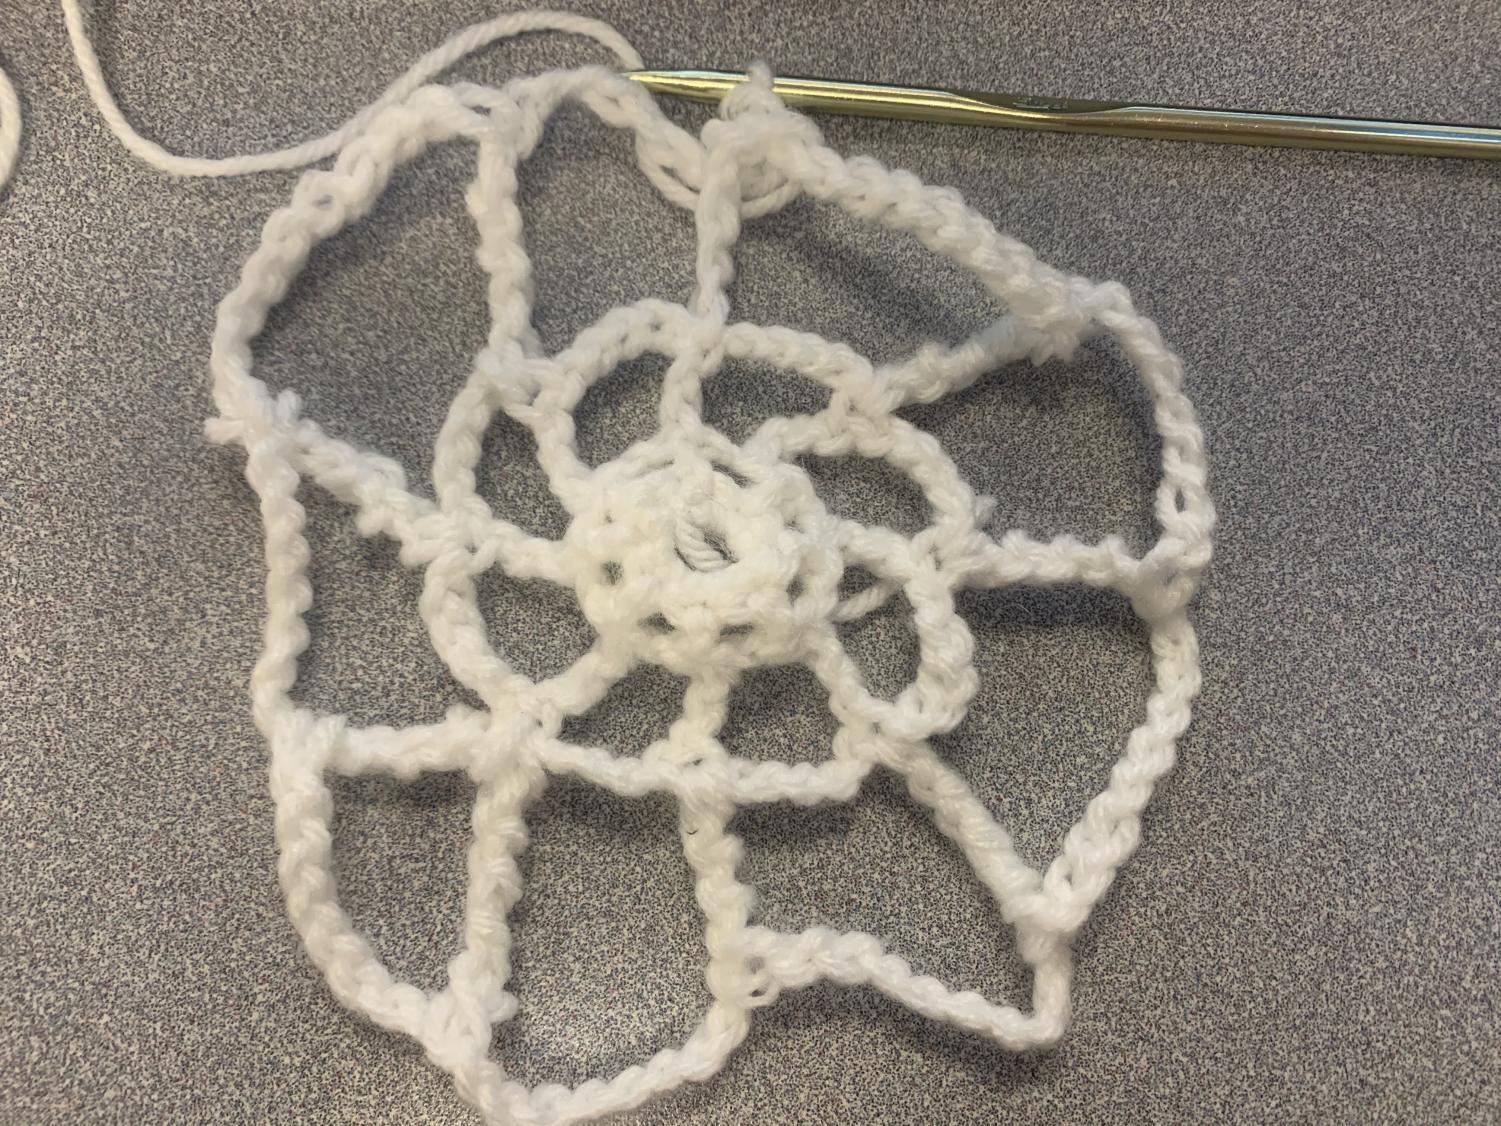
For the final round, I started by chaining seven to count as the first stitch. I chained 13 more to go in between the stitches. I then took my hook and skipped nine chains and entered my hook right above my next stitch from the previous round. I pulled through again until I had one loop and then chained 13 again. And I repeated until I was back at the beginning. I chained 13 and then joined the ends with a slip stitch yet again.

The process is basically a repeat of itself except that each round just has a greater amount of chains and the stitches are longer too. The video can probably explain it much better than I can so if you find yourself lost, I suggest watching the video.
How to make the spider:
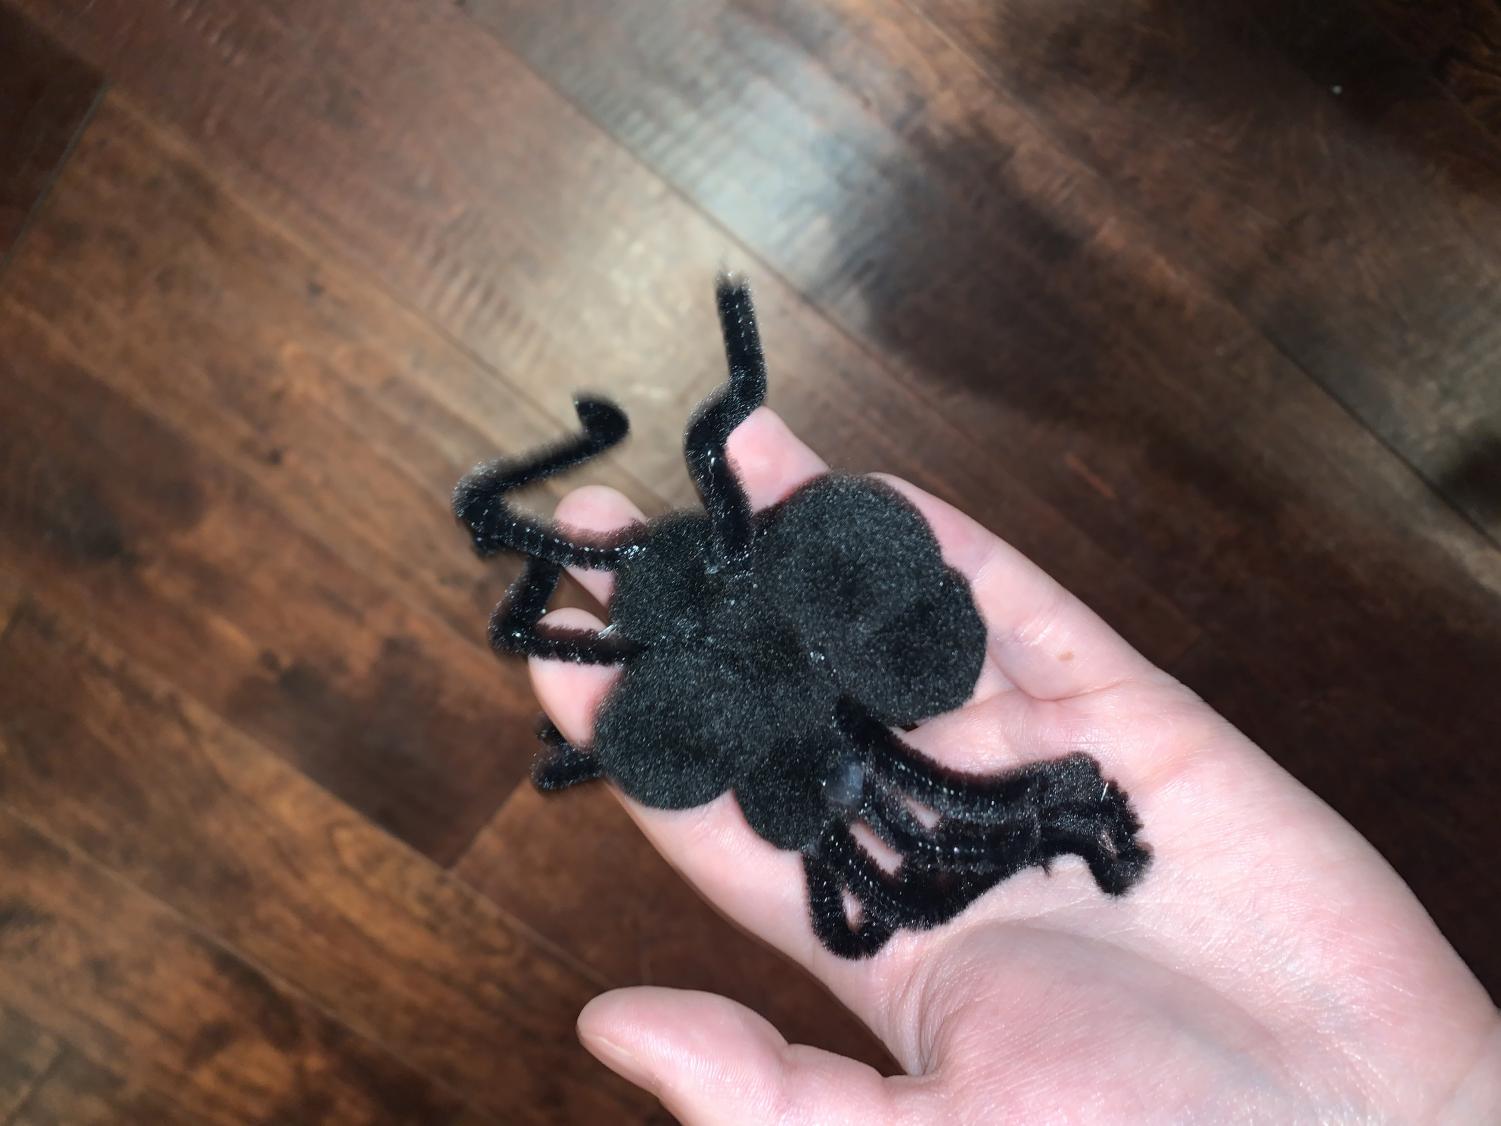
My process for the spider was very different than the DIY I found. In the original, the spider was made using pom-poms except the pom-poms were made from yarn and a pom-pom maker. I’m not an avid crafter, so I don’t own a pom-pom maker so instead, I improvised. I bought a small packet of black pom-poms and glued them all together to make one big ball of pom-poms. I then took two more pom-poms and glued them together. The bigger ball of pom-poms is the body of the spider and the smaller one is the head. I glued the head and body together to make the whole spider. I then grabbed two black pipe cleaners and cut each of them into four pieces. I bent the pieces to look like spider legs and then glued them onto the body (four on each side). And tada! You now have your spider. It looks way different than the original (at least for me) but that’s okay.
How to put it all together:
To put all the components together I used a lot of hot glue. First things first: attaching the web to the embroidery hoop. I stuck the web in the hoop and took the ends and glued them to the side of the hoop. I was unable to put the outside hoop over the ends of the web because they were too thick, so I had to use hot glue to help them stay.
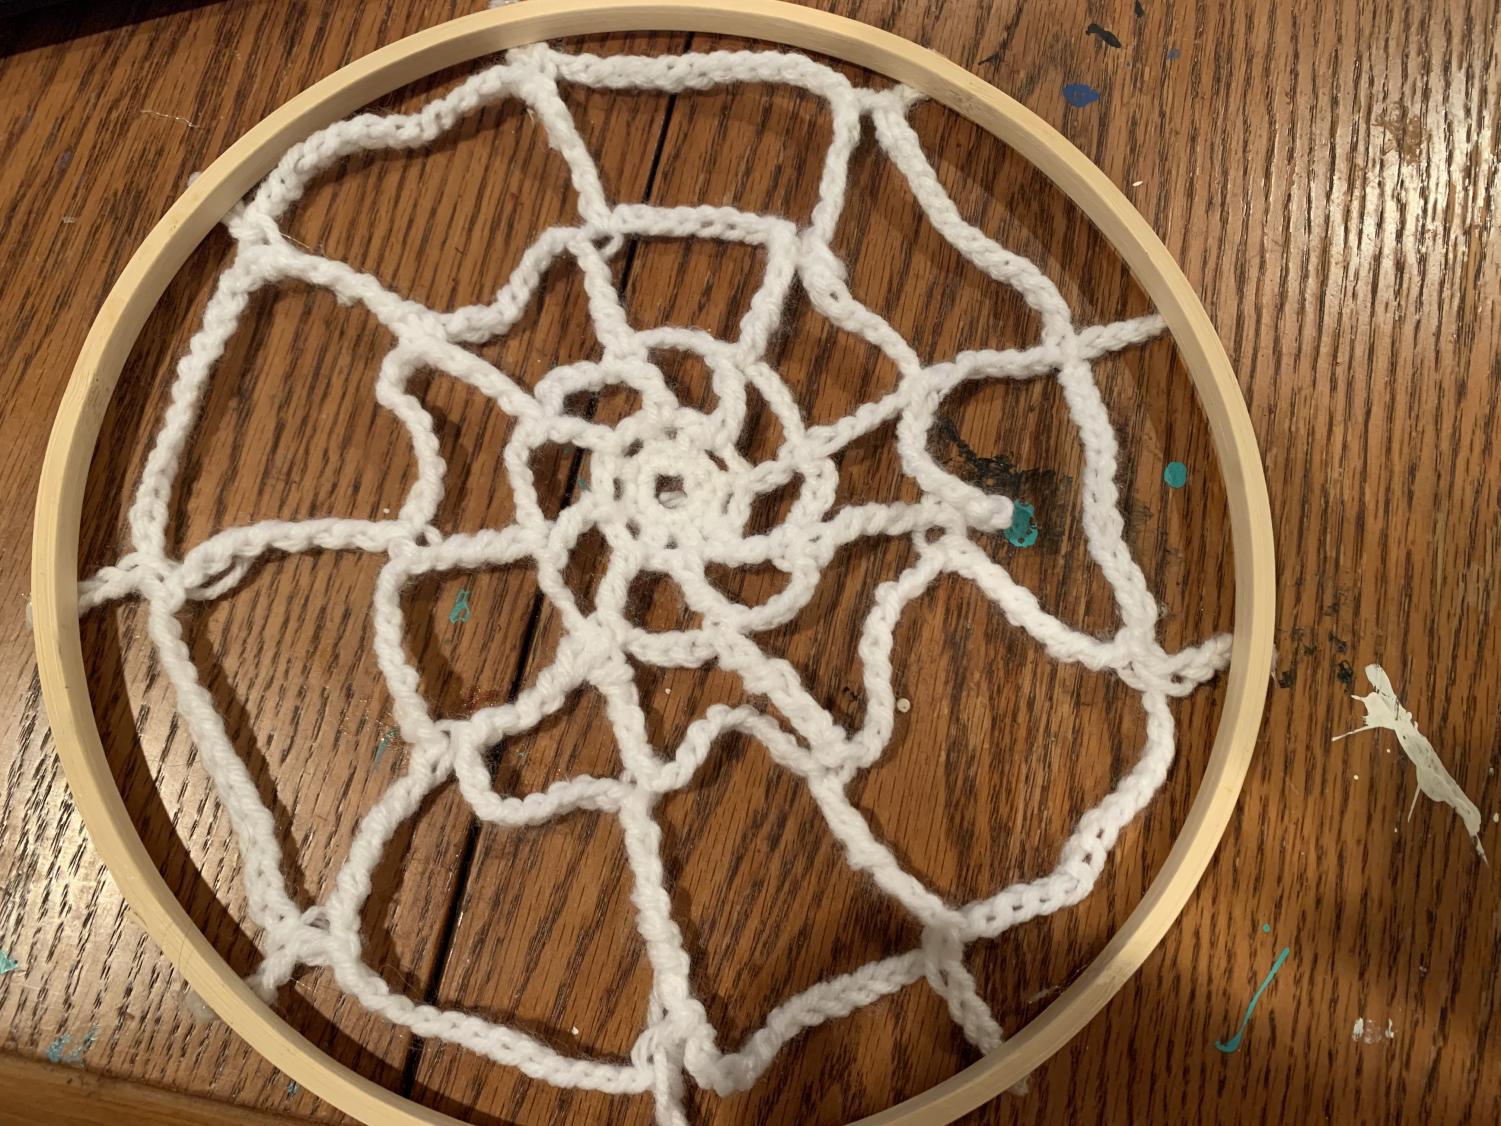
After I got the web in, I made sure my spider was all assembled and ready to go. I put some glue on the middle circle of the web and stuck the bottom of my spider right there. I adjusted the legs a little bit so they weren’t scrunched up and that was it. After that, the only thing you need to do is find a spot to hang your decoration. I grabbed a thumbtack and hung it up in my dining room.
There are a few things I wish I had done differently. When crocheting, there were some points where I needed to loosen up my stitches and at other points, I should’ve had greater tension. I feel like I should have found a better way to make the spider. Gluing all the pom-poms together kind of makes it look like one blob of pom-poms instead of an actual spider. I also wish I would’ve gotten a bigger embroidery hoop that way the web could’ve been a little bit more stretched out.
All in all, I feel like I did pretty well. Especially considering that I don’t craft much. I’m really proud of how my spider web came out and it makes me want to attempt more crocheting in the future- and just crafts and DIYs in general.

Helen Vasquez is a second year staff member for the AHS Cougar Call. She is a junior and looks forward to writing about school news and current events.
Vasquez...