Recreating a Bob Ross Painting Tutorial
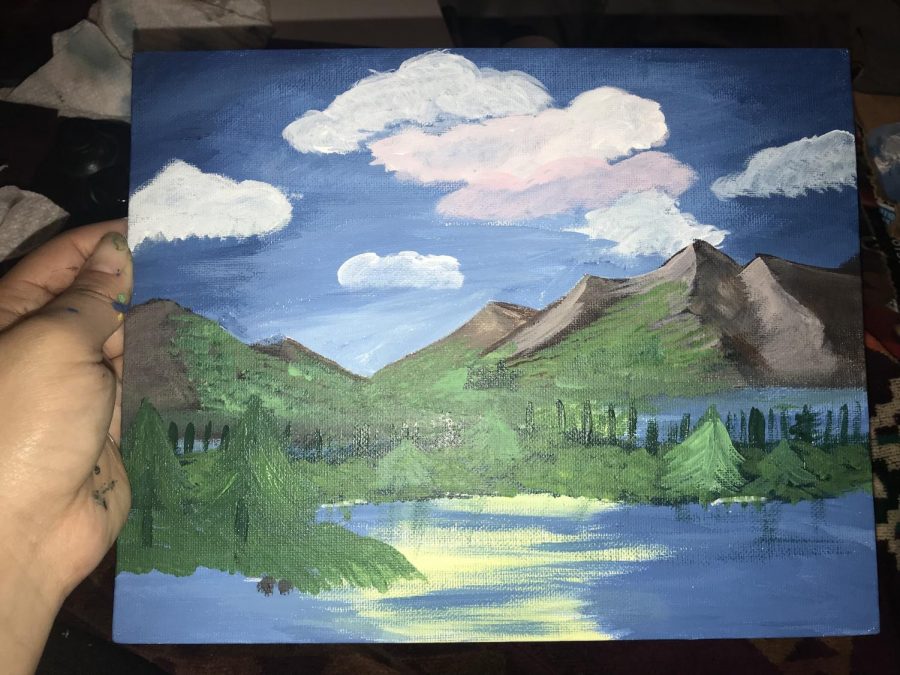
I always watch Bob Ross tutorials on Netflix. One day my friend texted me and wanted to come over and hang out. We both decided to sit down and find a painting to recreate. We chose Episode 14 from Collection 1 which is “Mountain Ridge Lake.”
 We gathered our supplies and began the episode. We started with no liquid white and cheap acrylic paints that I had at home because, well, I’m a high school student. Let’s be real.
“Let’s get crazy” – Bob Ross
The first step was to create the sky on the upper half of the canvas with some blue then blending dark blue into the corners to create some depth. Then, continue with the same dark blue on the bottom half of the canvas, leaving some space in the middle of the canvas for the reflection of the water. Now, Ross instructed to put some strokes of very light yellow on the water. My yellow was as bright as yellow could ever possibly be, but hey, “We don’t make mistakes, just happy accidents,” so I ran with the color. The more I blended the more it turned green so I just left it alone and moved onto the mountain ranges.
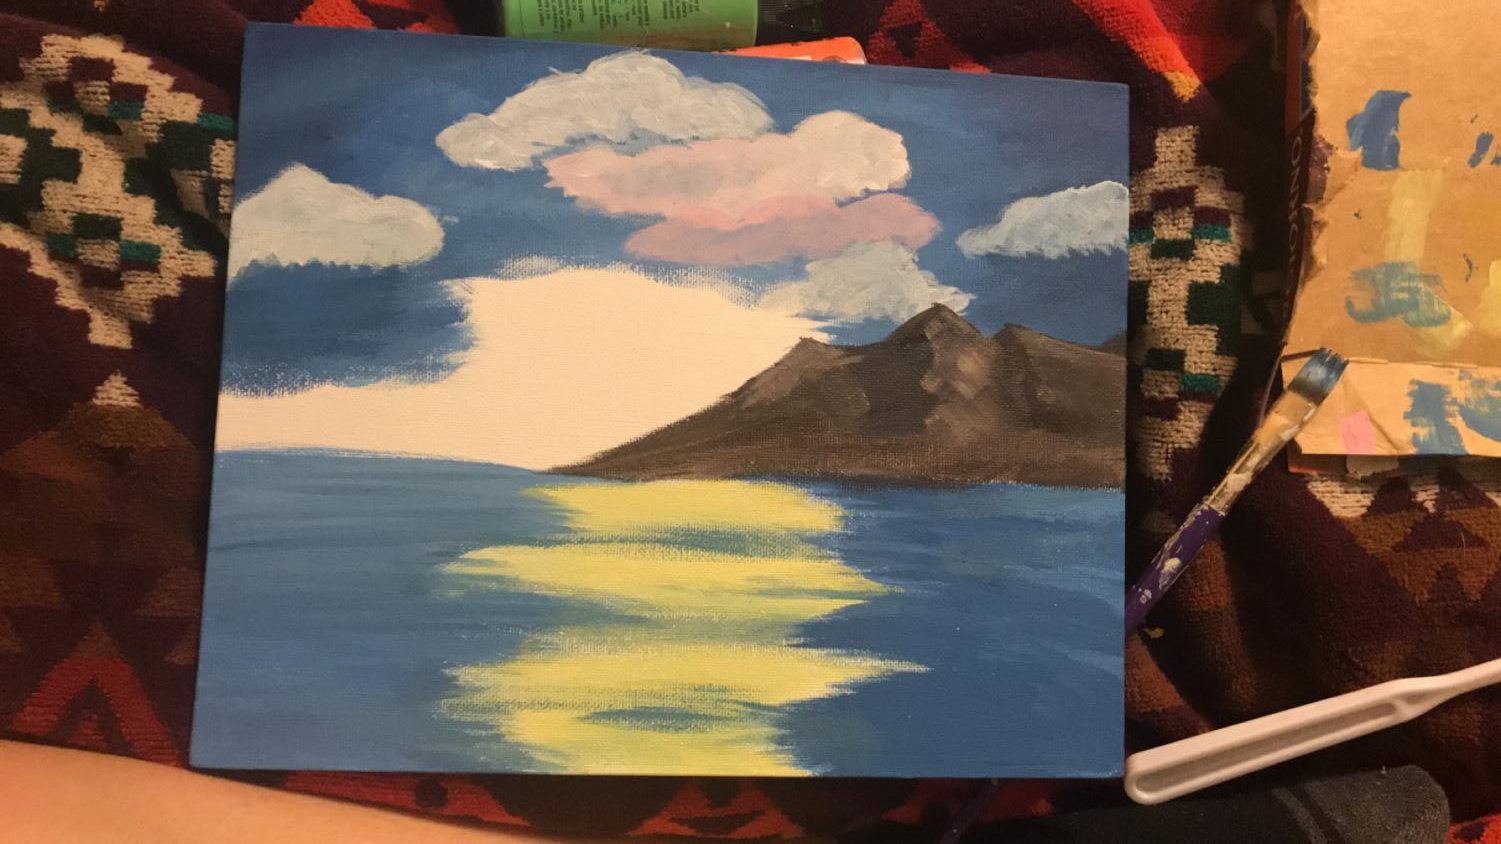 Next, I made some happy little clouds across the sky and added some pink to them. Then, I placed a mountain range on the right side of the canvas and made highlights and lowlights on the mountain. I decided to add another mountain range to the left and do the same thing. I then created a treeline and put some vegetation growing up the mountain. I put trees and such near the water and created a forest. Then, I did an ombre between the mountains that faded into a lighter blue.
And, four hours later, I was done. It amazes me that it takes Ross 30 minutes to paint these and I finished at 12 a.m. I loved painting this scene, though, and I plan on painting more in the future.

Monica Guajardo is a 17-year-old senior at Ada High School and is in her second year of being a part of the Cougar Call. She wants to be a Nurse Practitioner...